Getting started
Advanced Maps turns Obsidian’s Maps view into a photo album and a route map. Install the plugin, point a Base at some notes or photos, and the map appears. This page walks through both, and ends with a base file you can copy.
Requirements
Section titled “Requirements”Install
Section titled “Install”Advanced Maps is in Obsidian’s community plugin store.
- Open Settings → Community plugins.
- If Obsidian is in Restricted mode, turn it off. Obsidian first explains what a community plugin can do on your device, then asks you to allow them.
- Next to Community plugins, select Browse, and search for
Advanced Maps. - Select Install, then Enable.
You can also read the store page on the web: community.obsidian.md/plugins/advanced-maps.
Installing a build the store does not have yet
- Release: copy
main.js,manifest.json, andstyles.cssfrom Releases into<vault>/.obsidian/plugins/advanced-maps/, then enable the plugin. - BRAT: add
Jin1c-3/obsidian-advanced-mapsas a beta plugin.
Open Settings → Advanced Maps to see the installed version and a one-sentence update summary at the top of the settings home. Expand the history below it to read earlier versions’ summaries; it starts collapsed. The full changelog link opens the detailed update record.
On mobile
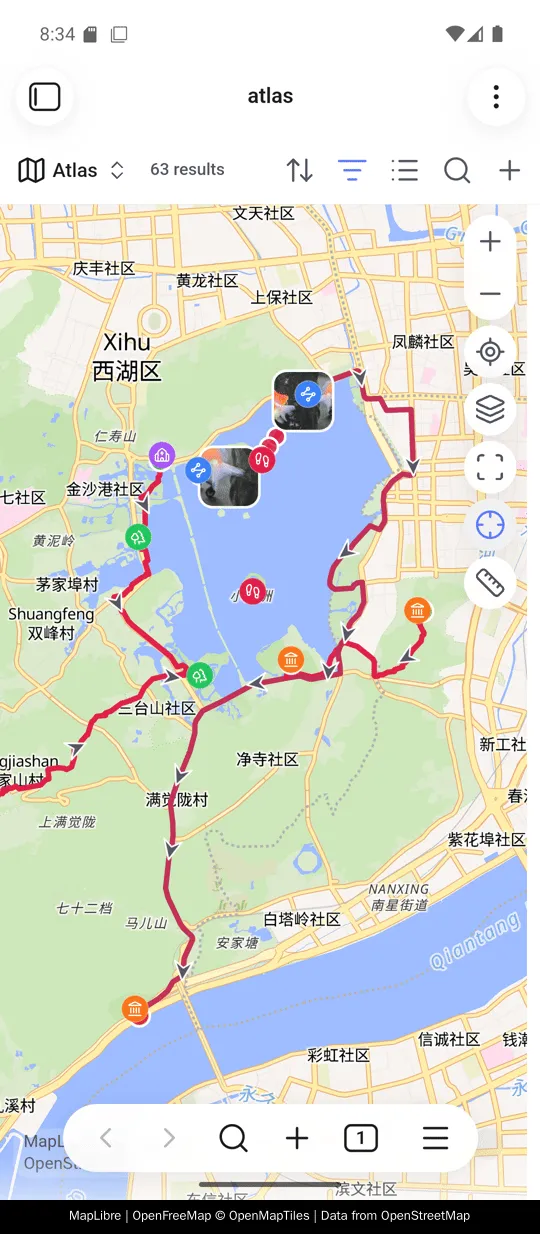
Section titled “On mobile”The mobile app draws the same map: note markers with their icons and colours,
GPX, GeoJSON, KML and TCX routes with direction arrows, photo thumbnails at the
places their photos were taken, the tape measure, and inline ![[track.gpx]]
maps with their statistics and elevation profile.
A phone has no mouse, so two words in this guide mean different things there.
- Long press wherever a page says right-click. That opens the map’s own menu, and a file’s menu in the file explorer.
- Tap wherever a page says hover. A tap opens a route’s popup and moves the elevation profile’s cursor. Two taps go further than a hover did: tapping a note’s marker opens that note instead of previewing it, and tapping a photo opens the photo itself, which carries Open note inside it.
An offline basemap draws here too, read from the device’s own storage.
How a Base becomes a map
Section titled “How a Base becomes a map”A Base is an Obsidian file that collects the notes and files you filter for and shows them as a table or a map. Its filter is the boundary of your map: whatever the filter matches is what can appear on it.
Advanced Maps then adds more. Each matched note brings the tracks and photos it links to. A photo or track file can also be a Base result in its own right, which is what makes a whole-folder photo album possible.
The snippet below is a complete .base file. Save it as atlas.base in the root
of your vault, replace the two folder paths, open it, and choose its map view.
You can keep editing the filter and the view options in the Bases interface.
filters: or: - file.inFolder("places") - file.inFolder("assets/onedrive/Pictures")views: - type: map name: Atlas coordinates: coords trackWeight: 4 trackOpacity: 85 fitMaxZoom: 16The first branch takes notes from a folder and turns each note’s coords
property into a marker. That property sits in the note’s frontmatter — the
properties block at the top of the note. The second branch takes photo files
directly. JPG, JPEG, PNG, WebP, HEIC, HEIF, and AVIF are supported.
“Every photo” means every photo that carries a location. A camera stores that location inside the photo, as EXIF data. A photo with no location stays in the Base results but gets no marker, because nothing is invented for it. A photo with a location but no usable embedded thumbnail still gets a plain dot.
View keys added by Advanced Maps
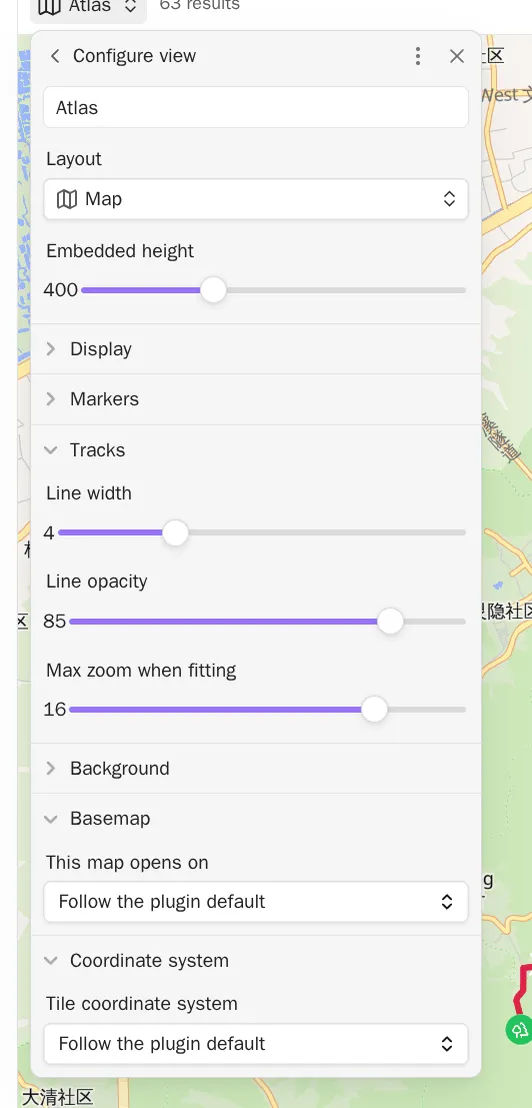
Section titled “View keys added by Advanced Maps”The last three keys in the example are options Advanced Maps adds to the Bases interface, under Tracks and Coordinate system. Leave them out and the map follows your plugin settings instead.
| Key | Option in the view | What it does |
|---|---|---|
trackWeight |
Line width | How thick a route line is drawn |
trackOpacity |
Line opacity | How transparent a route line is |
fitMaxZoom |
Max zoom when fitting | How far automatic framing may zoom in |
coordSystem |
Tile coordinate system | Blank follows the plugin default |
Where to go next
Section titled “Where to go next”- Photo maps — map a photo folder, or the photos your notes link to.
- Tracks and areas — choose between a normal link and an inline map.
- Around and navigation — set up one Base for note navigation.
- Coordinates and services — fix a basemap that sits a few streets off, or open a place in another map app.