Offline basemap
Point a map at a folder of map tiles already on your disk and the ground under your notes stops needing a network. Your notes, routes, and photos are files in your vault already, so the background is the last piece.
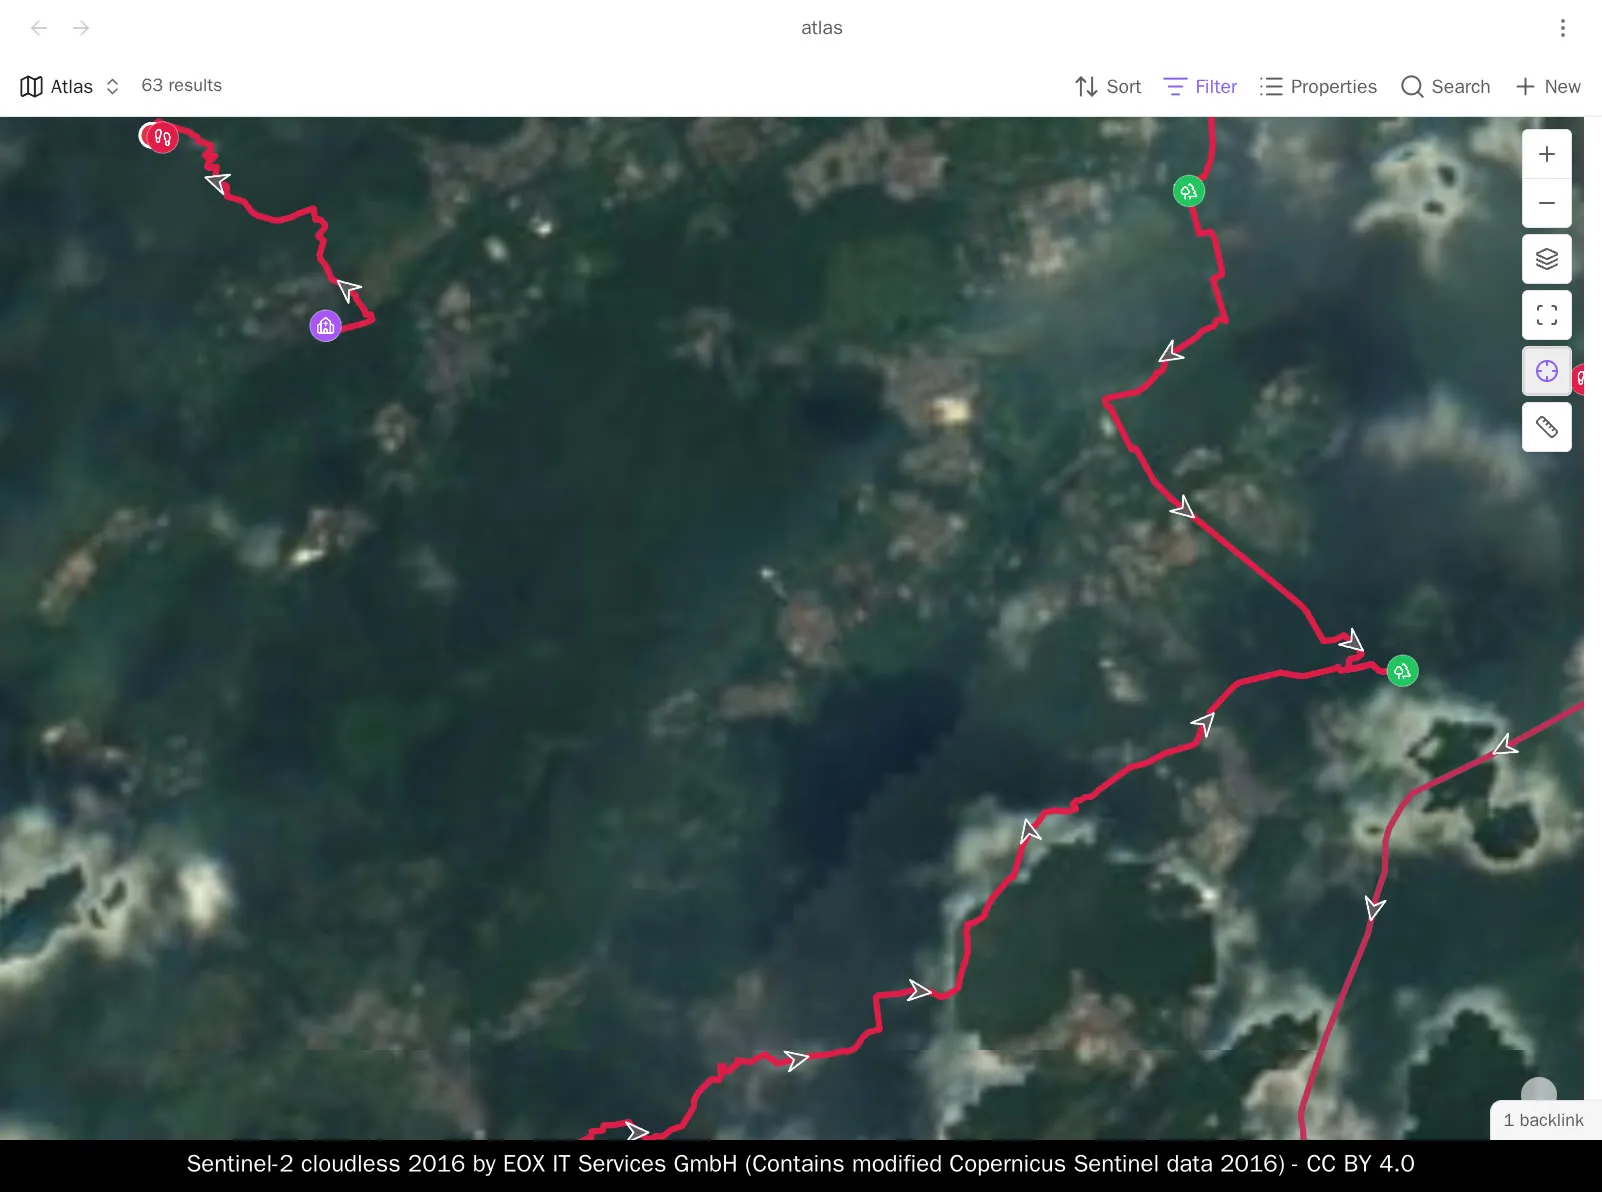
You can keep more than one pack. Packs are regional, so if you have one you probably have two: the city you live in and the trail you walk. Each gets a name, and the name is how you pick between them.
Advanced Maps does not download tiles. Fetching a provider’s tiles in bulk is theirs to permit. What this does is read a pack you already have.
What a tile pack is
Section titled “What a tile pack is”A tile pack is a folder of small map images in z/x/y order — one folder per
zoom level, one per column, one image per row — the way every online map labels
them:
tiles/ 6/ 52/ 25.png 26.png 7/ 104/ 50.pngAny tool that unpacks into that shape works. A single-file .mbtiles or
.pmtiles archive does not, yet. .pmtiles support is waiting on an Obsidian bug
on Android, not on the format. Until that is fixed, unpack the archive into a
folder tree once and the result is a tile pack.
| Your settings | Put the pack | And type |
|---|---|---|
| Stay on one device | anywhere on that device | an absolute path |
| Sync between devices | a dot-folder inside the vault | .tiles/{z}/{x}/{y}.png |
A path is a single string, so synced settings hand every device the same one, and
an absolute path can only be right on the machine it was typed on. A dot-folder
gets around that. Obsidian skips a folder whose name starts with a dot, the way it
skips .obsidian, so the tiles are never indexed, never searched, never a Base
result, and never shown in the file explorer. Each device resolves that one
relative path against its own vault.
If your settings stay put, there is nothing to solve: give each device an absolute path of its own. See On a phone for what that looks like there.
Add a pack
Section titled “Add a pack”Open Settings → Community plugins → Advanced Maps → Offline basemap.
Use offline basemaps is the first row, and it starts off unless you had a pack configured before this version. Turn it on first. With it off, the packs below it are shown but cannot be edited, because there is nothing to collect them for. Turning it off later keeps every pack exactly as you left it.
Under it, Add tile pack gives you a row with four boxes:
| Box | What to put there |
|---|---|
| Name | What you want to call it — City, Trail. This is what you pick it by |
| Tile path | /home/you/tiles/{z}/{x}/{y}.png — the shape your files are addressed by |
| Lowest zoom level | The lowest-numbered folder that pack’s z directories go down to |
| Highest zoom level | The highest-numbered one |
The path may be absolute, or relative to your vault. {z}, {x}, and {y} are
filled in per tile. {-y} works too, for packs laid out in TMS row order.
Default background, below the list, is what every map opens on unless the map says otherwise. Leave it at None and your packs stay configured and pickable without changing any map until you ask for one.
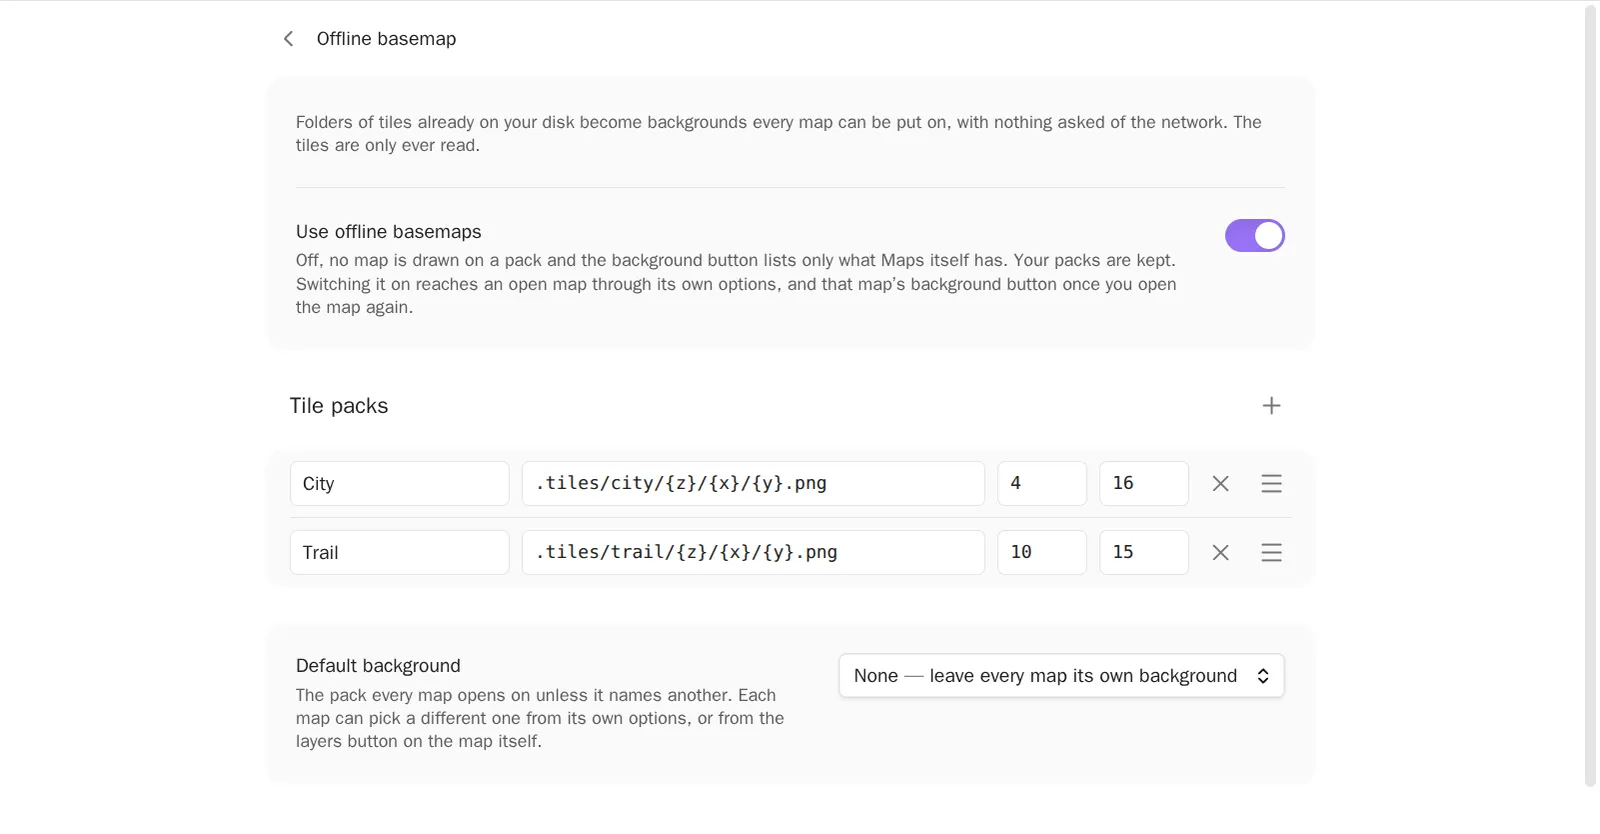
Give each pack its own name. Two packs sharing a name count as one, and the second is left out.
A row says so, under its boxes, when nothing can use it: a name another row already has, a path with no name, or a path missing one of its three placeholders. The row stays where it is until you correct it, and is offered nowhere before then.
The two zoom levels
Section titled “The two zoom levels”They are the folder names at either end of the pack, and each one stops a different failure.
- Highest zoom level bounds the tiles. Zoom in past it and the map keeps drawing by magnifying the deepest tiles you have, instead of asking for files that are not there. Set it too low and you lose sharpness you had. Set it too high and every tile past the end is a failed read.
- Lowest zoom level bounds the camera. Zoom out toward it and the map stops there instead of going blank, because there is nothing above your lowest level to magnify.
If a pack covers z0 to z14, put 0 and 14 in. Each pack carries its own pair,
and the map is bounded by whichever pack it is drawing.
Pick one from the map
Section titled “Pick one from the map”Your packs appear in the map’s own layers button — the stack of squares in the top-right corner, the same menu the Maps plugin lists its own backgrounds in. Each pack is there under the name you gave it.
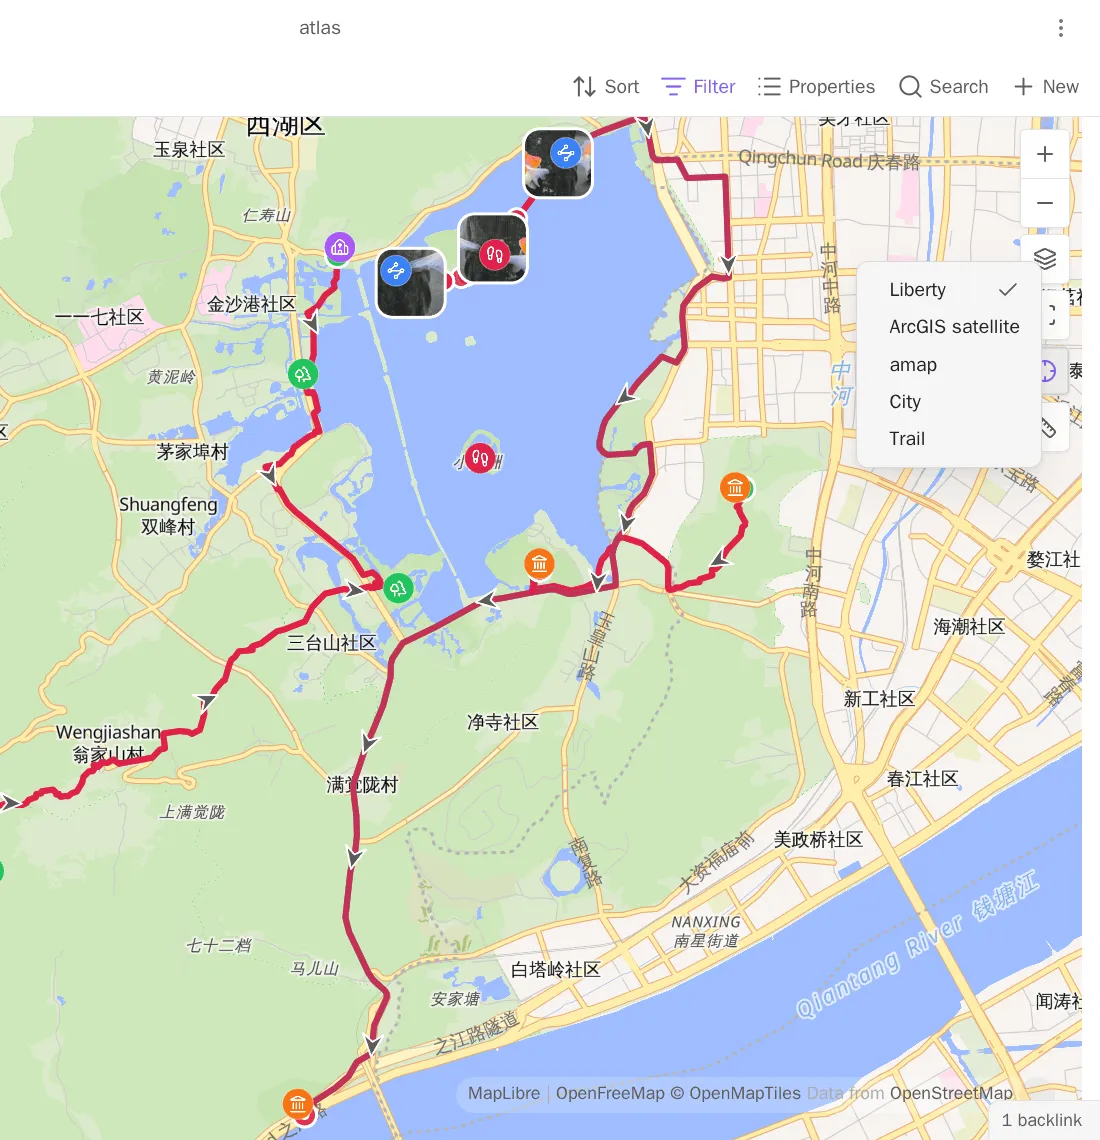
Choosing one draws it, with that pack’s zoom bounds. Choosing one of the Maps plugin’s backgrounds puts the map on that instead, and it stays there until you choose again. Nothing puts a pack back underneath you.
The layers button appears once there is more than one background to choose from. With no backgrounds configured in the Maps plugin, one pack is enough to make it appear, and the menu gains a Default background entry — the way back to what the map would draw with no pack at all.
A choice here lasts as long as the map is on screen. Close the tab and reopen it and the map is back on the background its view names. Nothing is written to a file.
Per map
Section titled “Per map”The Basemap section of a map view’s options has one row, This map opens on, listing every background there is: the plugin default, each background the Maps plugin offers, and each of your packs. So one base file can hold a view on a city pack and another on the network.
| Choice | What that view opens on |
|---|---|
| Follow the plugin default | Whatever Default background names |
| None — this view’s own background | What the map would draw with no pack at all |
| A background, or a pack, by name | That one |
Your view’s own Map tiles setting is never overwritten. A pack is substituted as the map is built, so choosing None on a view brings back exactly what that view had configured, with nothing to undo.
If a view names a pack you have since renamed or removed — or a base file written
in another vault names a background this one does not have — the map falls back to
what it would draw with no pack, and the row says so: Trail — no longer configured. Nothing quietly becomes something else.
Inline ![[route.gpx]] maps have no view options of their own, so they follow the
plugin default.
Coordinate systems
Section titled “Coordinate systems”A local path names no provider, so Auto reads a pack as WGS-84, which is right for the OpenStreetMap-derived packs almost every pack is. If yours was unpacked from a Chinese provider it is GCJ-02, and automatic mode cannot tell. Say so in Settings → Coordinate system, or in the view’s own Tile coordinate system option. See Coordinates and services.
On a phone
Section titled “On a phone”The same settings draw the same packs in the Obsidian mobile app, the same two layouts apply, and the layers button offers them the same way. There is no separate mobile row to fill in.
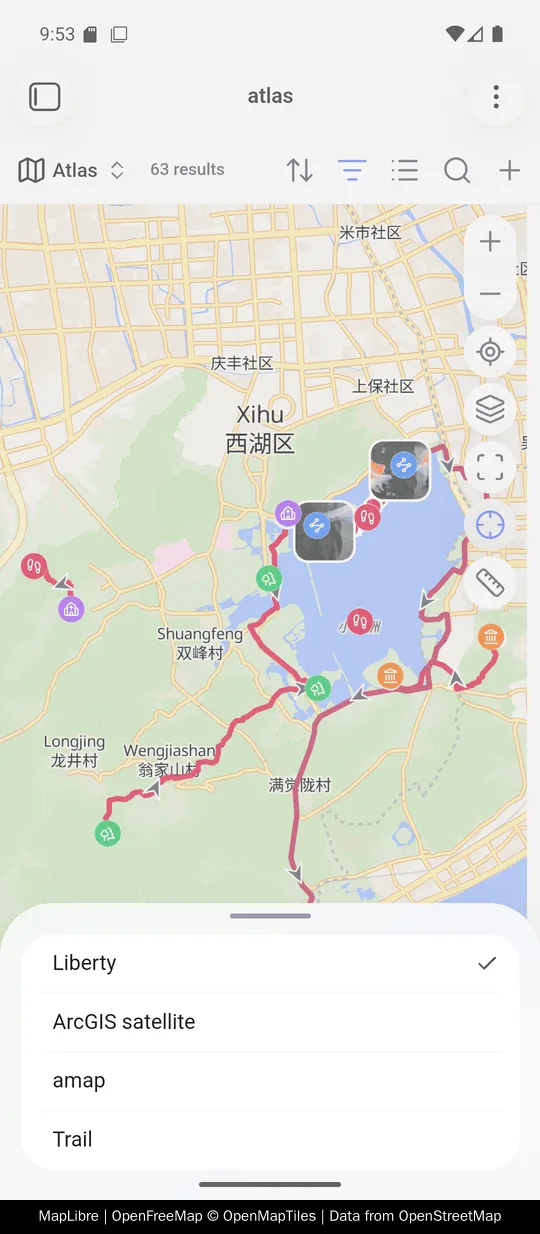
Settings that stay on the device. Give the phone absolute paths of its own,
such as /sdcard/Download/tiles/{z}/{x}/{y}.png, whatever your file manager
shows you. This is the one to use on Android: the packs sit where the phone
already keeps large downloads, and nothing about them comes near the vault.
Settings that sync. Use .tiles on every device, including the phone. A phone
handed a desktop’s absolute path draws your own pins over the background colour
and nothing else. The path resolves; the tiles simply are not there, and no error
says so.
Getting a pack onto the phone is up to you: a cable, or the sync that already carries your vault.
The phone path is asked of the running app rather than built from a platform name. It is measured on Android. On iOS the same pack is expected to draw, but iOS was not tested; if it does not, the map shows your pins over the background colour.
When nothing draws
Section titled “When nothing draws”The map goes to the background colour and your pins and routes still show. Check, in order:
- The path. It has to be the path to the tiles,
{z}/{x}/{y}and the file extension included, not the folder above them. Substitute real numbers and open the file; if that file is not there, neither is the tile. - The extension.
.png,.jpg, and.webpare all fine, but it has to be the one your files use. - The zoom levels. A lowest level higher than where the map is sitting pins the camera. A highest level set to 0 leaves one tile for the whole world.
- Which pack. The map may be on a different one. Open the layers button and see what is selected, or read the view’s This map opens on row.
With it switched off
Section titled “With it switched off”Off is the state a vault with no pack is in, and it is a real off: nothing of this feature reaches a map. The Maps plugin’s background button lists exactly what Maps itself has, because that list is Maps’ own. Adding your packs to that menu means handing the button a list this plugin keeps, and a background you add in the Maps settings tab then reaches an open map on its next configuration reload rather than the next time you open the menu. That is what this switch lets you decline.
A map’s own options lose their This map opens on row too. A base file that already names a pack keeps the name written in it, unread, and means it again the moment you switch back on.
Switching it on reaches a map that is already open through that row. The background button on that map catches up when you open the map again, because a button is handed its list once, when the map is built.
What this touches
Section titled “What this touches”Nothing. A pack is opened for reading and never written to, moved, or deleted, and nothing here fetches tiles from a provider. Your packs are offered in the Maps plugin’s own menu without being written into its settings. A map drawing a pack makes no tile request over the network at all — see Reference and privacy for what does leave.